As with most things in life, getting pretty good points in applique is a matter of practice. The basic technique involves turning and tucking and trying not to fray the fabric while you're doing it.
And sometimes, the easiest way to do it is to not make a point at all! Quite often a curve will serve just as well as a point, depending on the design and the reason for the point. Much of the time, I'll look at a design and think about whether the points can be rounded off; if they can, usually I'll do it that way. But sometimes--as with stars--the design probably wouldn't look quite as well with curves.
In the first photo, I've lifted up the point to show you that I've ironed the fabric to one side and then the other to form a point. That is done during the preparation of the applique piece, and I don't glue the tip down, because I know I have to do a little manipulation with it.
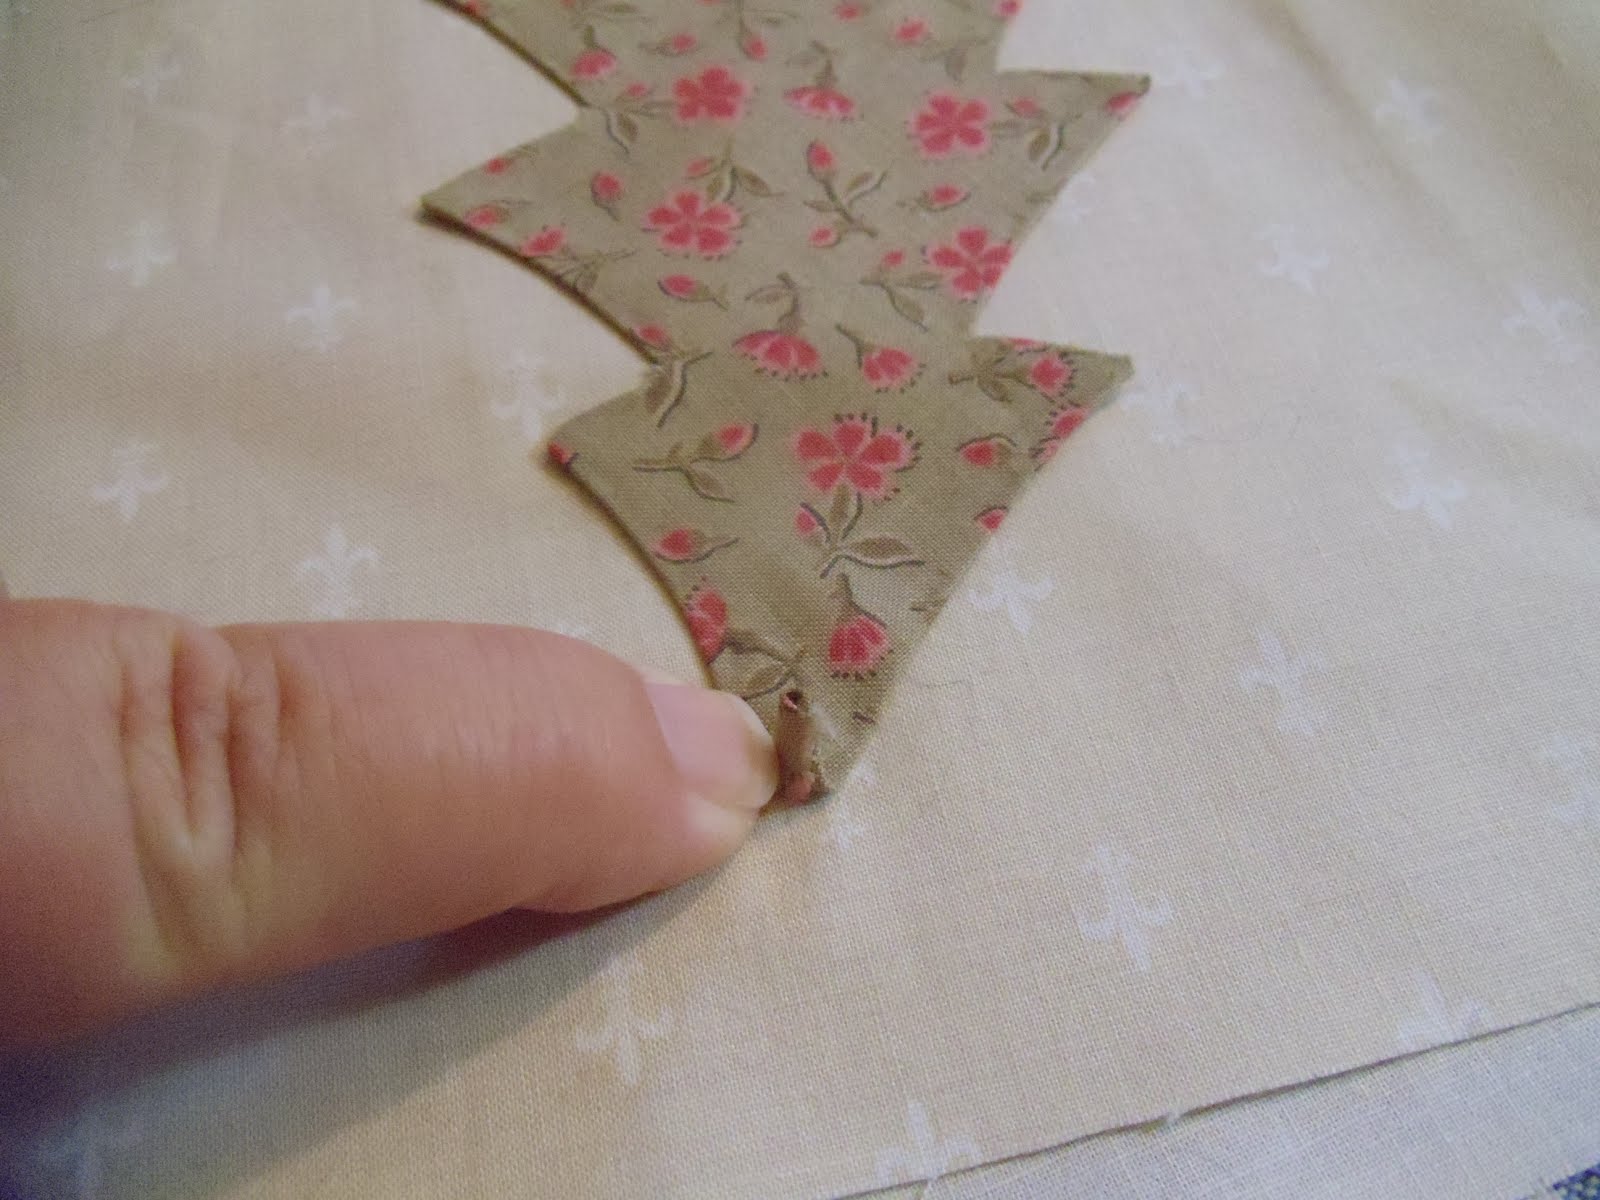
In the next photo, where I'm not lifting up the tip, you can see there's a bit of overlap of fabrics from the back, and one side is sticking out a little from underneath the point.

I stitch along the straight edge until I get closer to the point and then I trim off the fabric flap that's sticking out. I'm careful not to cut too close to the tip and to leave myself at least a few threads of fabric that can be turned under and stitched. Also, I've found if I trim the little flap too soon--before I get to the tip--sometimes the fabric at the cut will fray a bit just from handling it and I won't have a good folded edge to stitch through.

There's no photo that actually shows this part, but I gently push the cut edge of the fabric under the tip with my needle--it will make the tip a bit bulky but at least the point will look like a point. This is where the practice comes in--don't expect it to be perfect the first few times. Or EVER for that matter--as long as I've been doing this, my points aren't perfect, but I think they're good enough.

There are various glues and gadgets appliquers have come up with to help with points and valleys. Take a few classes and try out different techniques and tools--you might find something works really well for you. I find that the more "stuff" I try to use, the more likely I am to turn the applique piece into a frayed mess, so I keep it simple, but that's not to suggest one of the techniques won't work well for you.
Now that I made it over the tip, it looks like I'll be heading to the valleys next. I'll show you what I do there tomorrow night.


3 comments:
Beautiful points, I appreciate this series of helps...I have the most trouble with the points and valleys. Of course, now I have a ring of death (trolley?) to wield so I expect all will go well as I travel down the applique trail.
Nice! Are you packed yet?
Hi Kim! Just wanted to tell you that I LOVE your blog!!! I follow many, and yours I can just keep on reading and reading. We lost power for six days last week, with those thunderstorms on the east coast, so I didn't get to keep up with blog reading. This morning I was up at 3:45am, unable to fall back asleep, and spent two hours reading all your blog updates! You are so entertaining, as well as informative, for a relatively newbie quilter like me. Anyway, I ended up ordering the "Sew Spooky" block of the month, after seeing you post about it. I don't really know if I can blame it on Mary, LOL. Thanks for some great reading!
Post a Comment