About a month ago, my friend Imelda agreed to show the rest of the ladies in our stitchery group the method of applique she likes to use, and I've been using her method ever since. I think it's a bit faster and eliminates a couple of the drawbacks to the method I explained a couple of days ago. Here's what she showed us.
First of all, this method requires a number of "tools," unlike the other method I demonstrated. And really the need for so much equipment is the only drawback I see with using this method. You'll need an Omnigrid thingy that has a cutting mat on one side and a pressing mat on the other--or something similar. I kind of like the Omnigrid product because I can put my pieces inside and take them with me, and I'll have a surface to work on wherever I may be. This comes in handy with our monthly stitchery get togethers.

You'll also need applique glue and a toothpick, an applique iron, spray starch and a small container with a lid, a thin paintbrush, and one of the metal trolley weapons tools you can see in the photo above. Make sure the applique glue you use is water soluble.
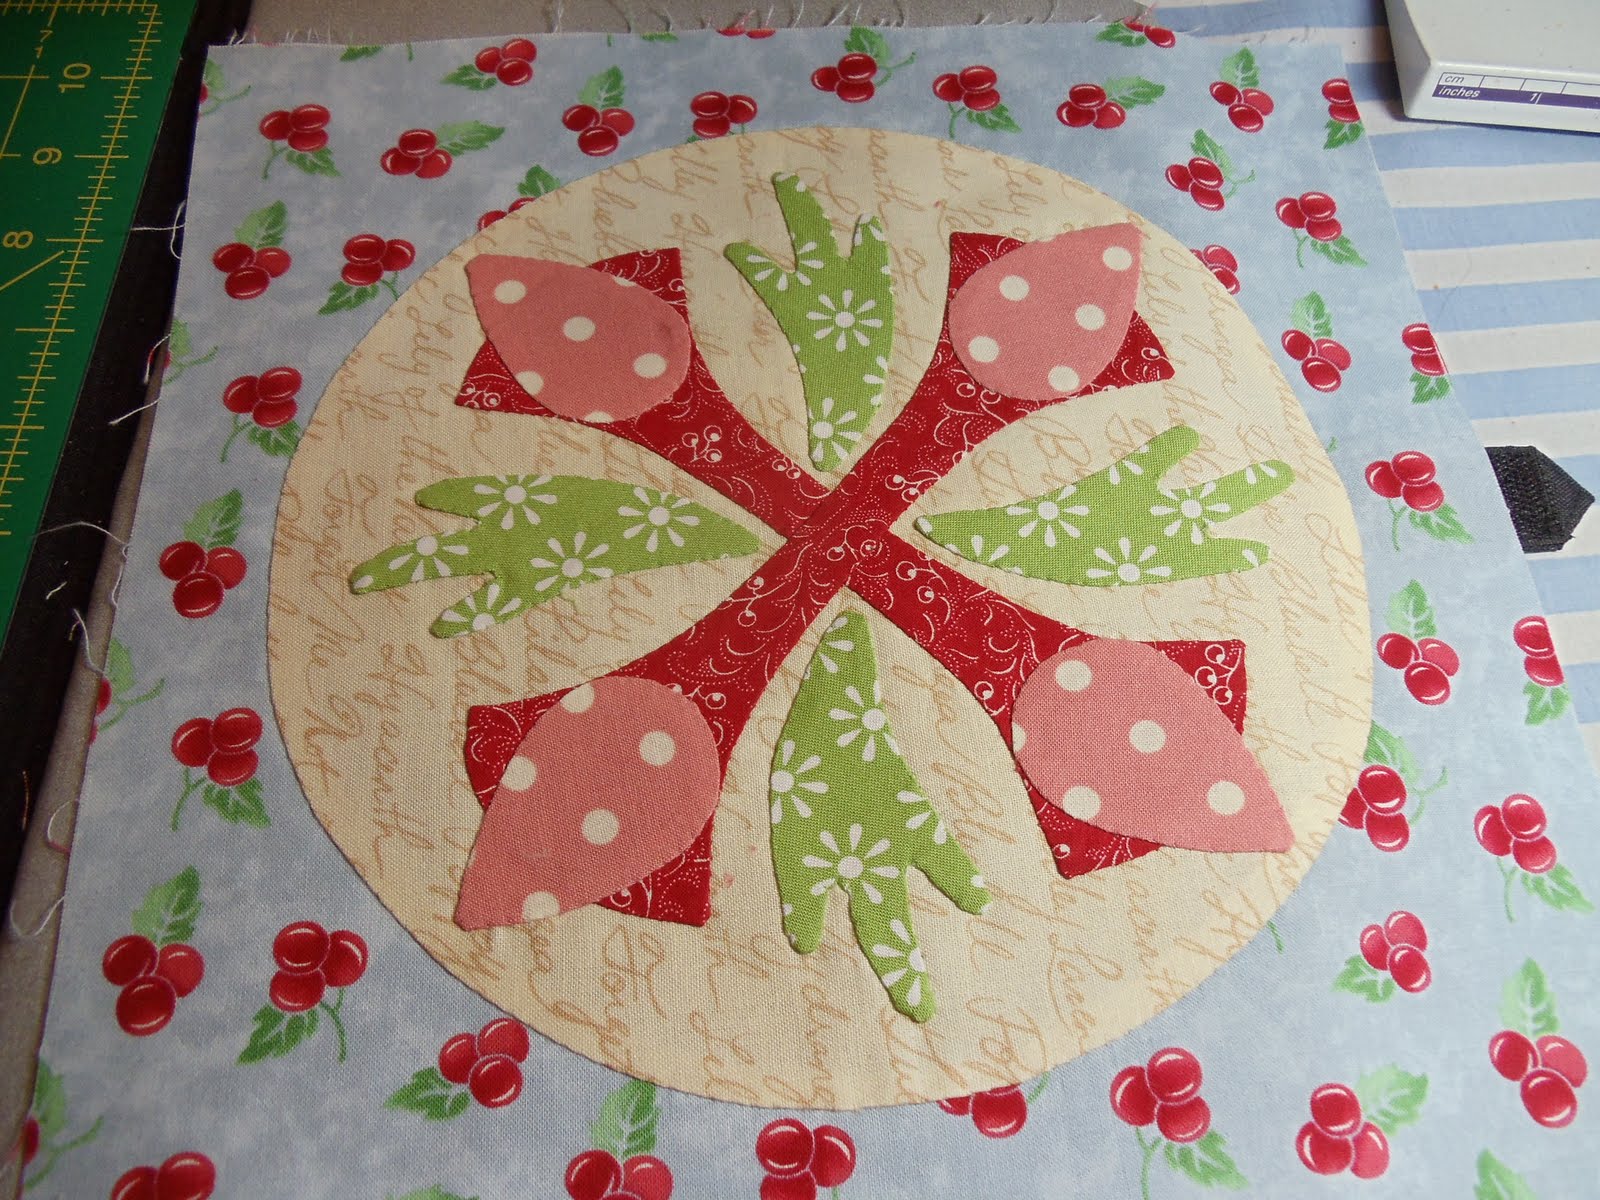
First you'll need to do all the preparation work I previously described for applique up to the point of basting the applique pieces with needle and thread. Before going further, check layout by placing all of the applique pieces where they'll eventually end up. This is a good time to check to make sure the colors and prints you're using work well together.

If everything looks right, turn on the applique iron and get out the starch and paintbrush. [Imelda sprays a small amount of starch into the lidded container and waits for the foam to subside.] Using the paintbrush, paint a bit of starch along the fabric close to the freezer paper. Too much liquid will soak into the paper and make it soft, so brush the starch on sparingly, and only work with a section an inch or two long at a time.

The metal trolley is worn on the middle finger of your non-dominant hand--for me, that's my left hand. The applique iron is held in the dominant hand. Which leaves no hands for holding the camera--so you'll just have to imagine I'm doing these steps using both hands working together.

Fold the starched fabric around to the back of the freezer paper and hold it in place with the metal trolley while setting the fold with the iron.

Repeat until all applique pieces are prepared. It will take a little while to get the hang of it, but mistakes are simple to iron back out and begin again.
Once the pieces are prepared, check again for placement of all of the pieces.

I prefer to attach and sew the applique pieces in layers. Clear all the pieces off the background that do not belong on the bottom layer--in this case, I'll begin with the two red pieces that form an "X".

First I peel away the freezer paper. Most of the time, the applique will hold its shape, but a little touch up with an iron helps if an edge isn't cooperating. Using a toothpick, run a thin line of applique glue along the outside of the applique piece but don't glue too close to the edge--glue would make it harder for a needle to go through the fabric.

The glue will dry quickly. You can then stitch the applique pieces to the background as I described in the prior applique post.
Repeat with additional applique layers until done.
The main benefit to using the glue rather than pins is that the thread, as you're sewing, won't get caught on a pin. I know of other appliquers who like to glue all the pieces before sewing, but when I tried doing that, I felt my results weren't quite as nice--you might want to experiment, though.

Here's what the back looks like. As you can see, the center of the circle is cut away where I used the method I described previously, but the rest, using this starch and glue method, are layered, and none of the under fabric is removed.
Using this method, once the quilt is completed and washed, the glue will wash out, but if you're planning to hand quilt an appliqued quilt, you may wish to use an applique method that doesn't employ glue as it would be harder to needle.
It will take me a bit longer to get as good at this method as my friend Imelda. I'm much more ham-handed and I seem to burn myself on the applique iron quite a lot. But I do think I like this method better--it has all the benefits of freezer paper applique while eliminating some of the problems, like getting thread tangled around pins. There are many other applique methods, and of course, needle turn is probably used more often by experienced appliquers than freezer paper, but I still like freezer paper best--you may find something different works best for you. The key, though, is in trying all the methods you can find and then deciding which you enjoy most. If you haven't tried applique before, give it a try. You might find you like it!


8 comments:
This is the method I use. The only thing I would add is that if you double up on the freezer paper your templete is so much stiffer. Just iron shiney side of piece A to dull side of piece B. I also will trace onto piece B so that when I iron on piece A the ink that I drew with is now trapped between the papers and will not accidently bleed onto the fabric.
This is the method I was taught, but the metal trolley is new to me. Where can they be purchased? I love your tutorials! They are so helpful.
Looks like it's worth a try! I don't have a pointy, metal weapon/tool, but maybe I could use an older, small (very small-tipped) crochet hook. Hmmm. Thanks for the info AND pictures!!
what a great tutorial - Imelda will be proud of you!!!!
Your tut is great Kim. It is actually fun... I never thought that I would say that about applique, but it is! I love seeing this project that you are working on. I took an applique class/retreat this summer but I haven't managed to get it into my "routine" yet. Of course, my machine just got sick... so that might just force the issue!Ha!
This is also the method I use when I am in the mood do to that style of applique, right now I am over on the dark side (fusible). LOL
This is similar to the method that I use but after using the trolley a quilting buddy noticed my burn marks & suggested that I use what she uses ~ a stilleto rather than trolley. It has a wooden handle & a long piece of metal that is pointed & oh so sharp. I think it is from Pearl Peirira(?)Anyway in using it my fingers & hand are not as close to the hot iron. I also just used my ironing board & am eager to purchase & use the little folding brd you picture. Thanks for sharing the tut. You are so thorough & w/ words & pictures you make quilting techniques easy to try & accomplish.
Penny in SoCA
Great tutorial! I'm working on an apple-core quilt right now and I so wish I had your tutorial when I started it! There's always next time though.
Post a Comment