Back to quilting!
I'm often asked whether I mark my quilts for quilting. The answer to that question is: Not if I can figure out another way. Sometimes, though, I do mark--when it really matters. You may be able to see here that I used a white pencil to mark the straight line quilting in the basket:

Most of the time, though, I'll look at the space I need to fill and decide which "filler" design is best for each section. For instance, in the white area around the basket and flowers, I used a meander. I always think the meander stitch looks like jigsaw puzzle pieces, and if I hold that kind of thought or image in my mind while I'm quilting, it seems to somehow transfer from my brain, down my arms, and into the quilting. A meander stitch is fairly easy to do and isn't so interesting looking that it would take attention away from the basket and appliqued flowers.
First, though, before I quilt in the filler, I start by stitching in the ditch to outline and secure the area I'll be filling. If you look closely, you can see I've outlined the brown area with brown stitching.

I also like to use feathers as a quilt design. I thought the zigzaggy blue area (not visible in these photos but it's the area I "fixed" a couple days ago) and red area were perfect for feathers. First I "drew" (with the needle, not a marker) a line of stitches, keeping the wavy line centered in the space as much as possible. When I got to the end of a section, I came back down one side of the "stem" line making feather loops; then I did the same thing up the other side of the "stem" line. My feathers aren't perfect, but I think they're just fine. I adjusted the size of the loops as was necessary to fill in the area. You can probably see the feather quilting in the red area a little better in the photo below:
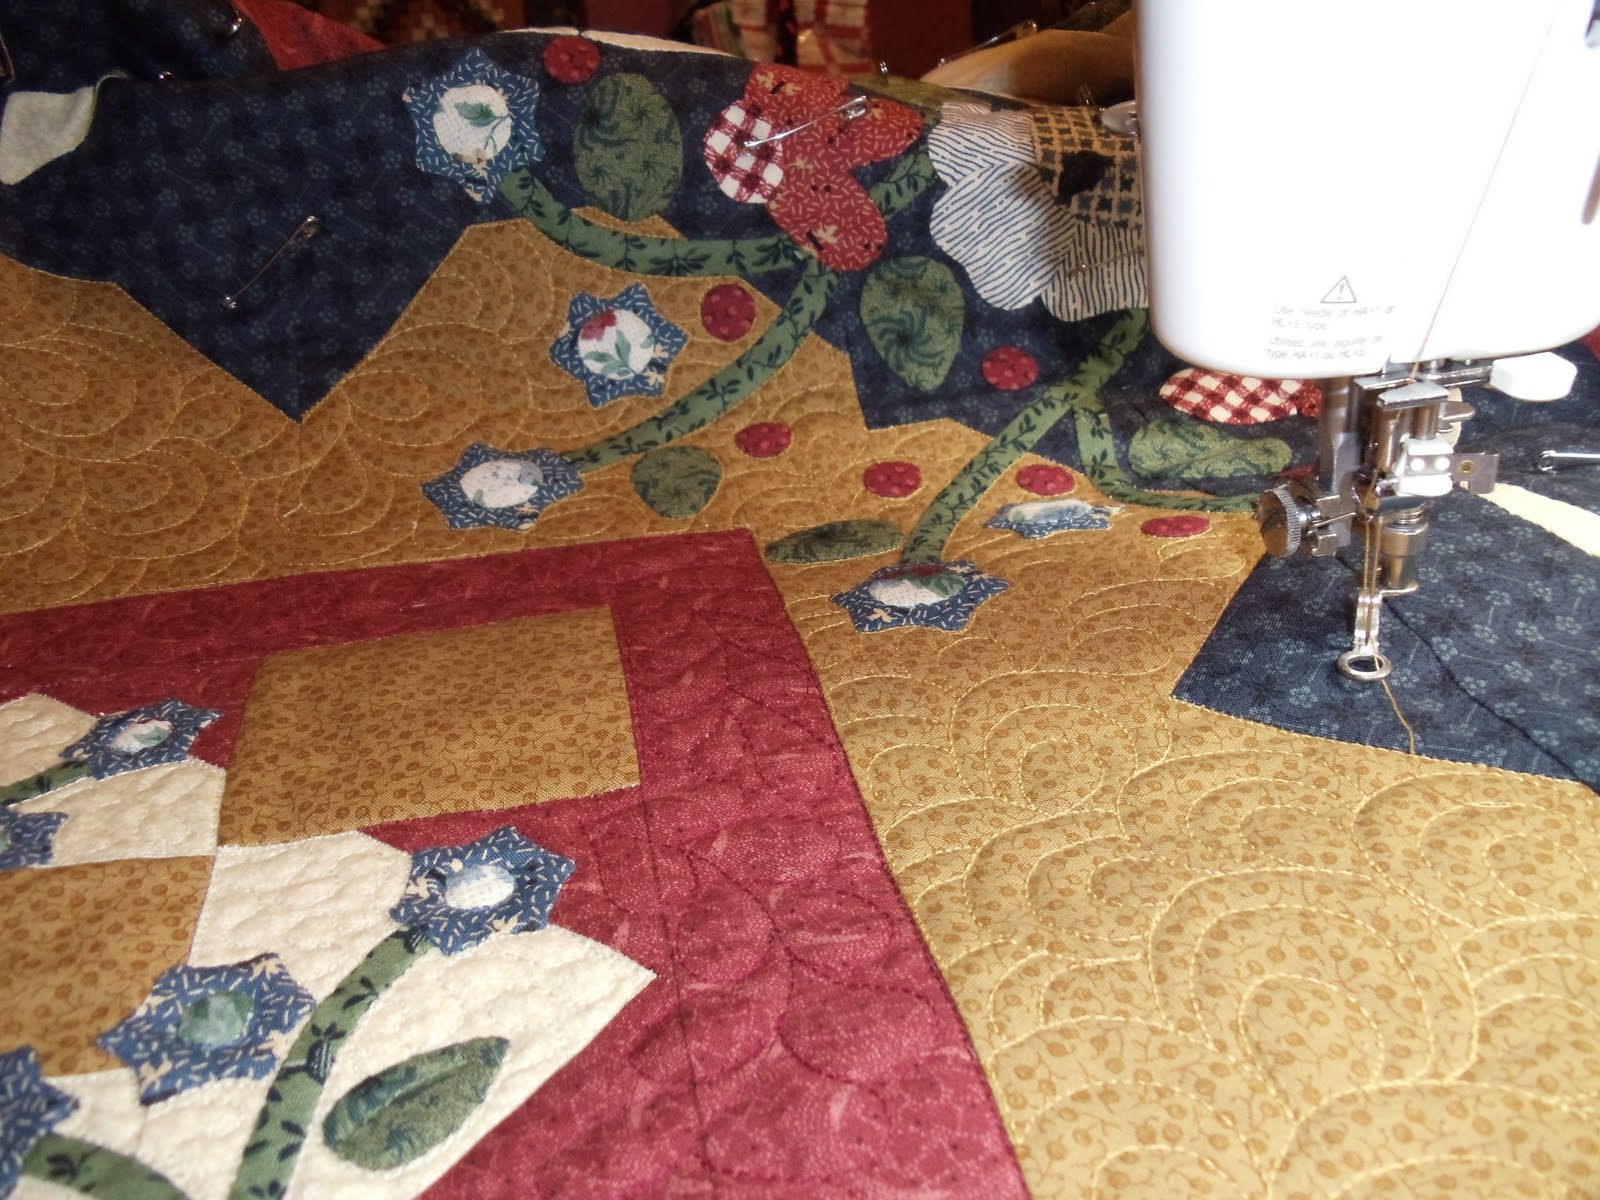
And see that triple loop quilting design in the brown section? That's a favorite of mine because it looks so much harder than it is! The only key, I think, is figuring out about how large the inner circle will be and the rest is just looping back and forth a couple times and then moving on to the next. A few years ago, I did a post demonstrating how it's done HERE.
When I begin a quilt project, I start quilting in the center of the quilt and work my way out to the borders. With this one, I'm about half way out to the edge, but if you think about it in terms of square inches, I've got a lot more left to do than what I've done so far. I haven't really planned the quilting designs ahead of time; I'm just tackling one section at a time, deciding what would look best in each. The blue section is next, once I finish the brown, and I'm not sure what I'll do. It might be more feathers to repeat the earlier blue section, or maybe I'll do something different. It might even be a good idea to throw some straight line cross hatching in at this point--which means some marking is in my future.
I'll get a photo of larger sections of the quilt soon, so you can get a better idea of what I've been doing. And I'll probably get a photo or two of how I'm quilting the appliqued areas.
Thanks for stopping in to see what I'm working on.


8 comments:
Stunning! Your instructions are easy to follow and this quilt is really becoming a magificent piece of handiwork! Aren't you going to be thrilled when you count it finished? :-)
looks great!
Kim your work is beautiful, both your piecing and your quilting. Are you quilting on a long-arm or mid-arm? I wish I were as talented as you are. Thanks for such a great blog to wake up to every day. ;>
Kim, thank you so much for your quilting "tutorial". I have learned so much from your blog. I am using your triple loop quilting design I have learned few years ago, and it is still my favorite!
For me it is the best, if I can see and learn from the pictures. So thank you again, have a great summer.
Jana in Prague, Czech Republic
Thanks for the hints and the link to your tutorial. I'm going to have to try and expand on my FMQ.
cindy
Thank you for sharing your thought process about the quilting in your projects. I'm never really sure how to approach it but your post gives me some ideas about what I can think about before I decide to get going. I like how you mix different patterns/fillers in the same quilt. Nice job.
Thank you so much for sharing your machine quilting tips and for the link to your prior post!
You are a busy bee - just like your blog background! Nice work, passion, talent, patience Kim!
Post a Comment