Wednesday, November 23, 2011

Happy Thanksgiving!

I don't know about you, but I've been running around like a turkey with her head cut off the past few days, trying to get everything done. After spending several hours of quality time at Hobby Lobby, Target, and Safeway tonight, I think I've finally gotten my immediate shopping done--unless I've forgotten anything. And if I have? I think Hubby might be running an errand or two.

The past couple years, when it's come to cooking our Thanksgiving meal, I've made it easy on myself by buying a couple of pre-prepared dishes from Trader Joe's. This year, I've decided to do everything from scratch. This year, I'm going to try to get the Wild Child to help, but Manager Man just flew in from New Yawk, so it might be tough to pry them apart. The plan for Wednesday night, so far, is for me, Hubby, Manager Man, and the Wild Child to go out to dinner at a Chinese restaurant after I get off work and then come home and prepare whatever Thanksgiving dishes we can.

Thursday is Thanksgiving.

Friday . . . well, I don't do the whole Black Friday thing, but I DO start heavy duty Christmas decorating--I'll be busy with that all weekend.

What I'm getting at, in a roundabout way, is that I'm quite possibly going to miss our daily get togethers a few times over the next several days. There's just too much to do and not much of it is going to be worth blogging about. So, just in case we don't chat before, I want to make sure I wish you a warm and wonderful Thanksgiving how. Have an excellent day!

Tuesday, November 22, 2011

Honey, Would You Like a Little Pie?

A couple days ago, I cleaned out the refrigerator and realized I had two small containers of blackberries that wouldn't live much longer. I also had some pie dough, but I knew I didn't have enough berries to make a "real" pie, so I didn't do anything about the berries that day. I guess, though, that somewhere in the back of my mind, I'd been thinking about what to do with those berries, because the next day, it occurred to me I could make mini pies in our large muffin tin. Genius!

That evening, after the mini pies came out of the oven, I asked Hubby if he'd like a little pie, and of course he said "yes!" I think he was a little surprised to see I meant that literally--what I served him WAS, in fact, a little pie.


I made a crumb topping for these, but I'm sure I could have made a regular crust for the top instead. To make these, I rolled out the dough and cut dough circles (I used a bowl as a template) that were a couple inches larger than the circumference of the opening of each cup. I sprayed the muffin tin with cooking spray and fit the dough down into the cups.

I took a look at the pie section of my Betty Crocker cookbook to get the general proportions of fruit, sugar, flour, and spices, and I "guesstimated" in making the filling--and it turned out just right! I filled the cups and then I made about a half recipe of crumb topping, which I thought would be enough to cover the tops of my six mini pies.

Most of the recipes I looked at called for cooking the pie at 425 degrees; because these were small, I thought maybe 400 degrees would be best, and they turned out okay--I just kept an eye on them to make sure they didn't over brown.

I know mini- and hand-pies are popular now and I can see why. These would make a perfect Thanksgiving--or any other holiday--dessert. In fact, if I were having a large crowd for Thanksgiving and wanted to offer my guests a selection of different types of pie, I think I'd make a few batches of mini pies with different fillings and whipped cream and ice cream on the side. Yum!

If you're stumped for an idea for Thanksgiving dessert or if you've been appointed to bring dessert to a large gathering, please feel free to use my idea. The other really excellent thing about these are the fact that they're small, which makes them the perfect treat to follow a large meal without being tempted to over-indulge. Bon appetit!
Monday, November 21, 2011

The Games People Play

With the holidays approaching and rain in the forecast every several days, it's a good time to think about playing board games with the family--at least it is here in our home. Of course, we have certain favorites we tend to play over and over again, so I was wondering what other games are on the market that we'd enjoy. There was some talk at my office last week about this game:


I was told this is a fun game to play in a larger group--perfect for Thanksgiving and Christmas. So I went over to Amazon and ordered it. While I was there, I started looking at other board games for my immediate family--I haven't really paid much attention to the new games in the last year or two.

Generally, our family enjoys games that don't require a lot of concentration, so some of the most popular strategy games probably wouldn't work for us. We like games that are fairly simple to understand and can be played in under an hour. And we need a game that can be played by three to five people as our immediate family is small.

Do you know of any games--new on the market in the last couple years--that you'd recommend for us? Also, what's your favorite game when you get together with a large number of people? There are so many games on the market that it's quite confusing to browse online, so I'm hoping we can share some suggestions. Thanks for your input!

Sunday, November 20, 2011

A Visit to the Quilt Show

As promised, I'm bringing you a little eye candy from the local River City Quilters Guild quilt show. In most cases, I don't know who the quiltmaker and/or quilter is, and I rushed through the show so quickly on my lunch hour, there wasn't time to take notes, but I'll tell you what I know about a few of these--or at least what I liked.

The theme of the show this year was a Symphony of Color. Each year, guild members are challenged to create a quilt using a specific fabric; this year there was a focus fabric and an accent fabric. I'm not sure which fabrics those are in this quilt, but it sure didn't LOOK like the quiltmaker was forced to use something "challenging" as many times these fabrics seem to be!


Jackie, one of the ladies from my Thimbleberries Club, made the quilt and certainly deserved the ribbon she received. It's a beauty!

As you can see, the next quilt received a special award too as signified by the rainbow colored ribbon. Unfortunately, I don't know which award this was given, but isn't it a stunning quilt? I LOVE circle quilts and you'll see I've photographed a few; I aspire to make one someday. The use of color in this one--and that may even be what the award is for--is simply luscious.


This next one may look familar to you--yep, it's mine! I entered two quilts this year.


This next quilt caught my eye from a few aisles away. I absolutely LOVE that rusty red she used with the contrasting black and cream. This one was made by Jan Soules, the show's featured artist. If you want to learn more about her, click on her name and it will take you to the guild's bio on her. There are also photos of a couple more of her quilts. I know I've seen the middle one with all the flying geese in a quilt magazine before.


I couldn't resist taking a photo of the next quilt, just because I've always loved this pattern and I have it in my pattern stash to make someday. I think this is the first time I've seen it made, though.


Laurel Anderson created the next quilt. Laurel teaches and writes patterns and books. Click on her name to view her website. Laurel has been a past featured artist, and the pattern for this quilt is available on her website. Isn't it a beauty?


Isn't this one fun and whimsical? It reminds me of Mary Lou Weidman's quilts. Sadly, I was running out of time and didn't read the story behind this one.


Another beautiful quilt--I told you I like circles! And I'm not the only one who liked it, as you can see by the rainbow ribbon.


If this one looks familiar--yep, me again. It was really nice to have this one hanging in a place where I could finally get a decent photo of it.


I think this is a fun Christmas/Santa quilt. My friend Sandy has the patterns. I may need to borrow them someday to make one for myself!


The show's over and my bed is calling to me. It's been another long and busy day. Thanks for stopping by to visit!


P.S.: There are many, many more wonderful quilts at the show I didn't get to photograph, and there are even some I DID photograph but didn't upload because I didn't want to overwhelm anyone. If you're in the Sacramento area today (Sunday), the show is open until 4 p.m. For information, click on the link to the featured artist, and from there you can access additional information about cost, location, hours, etc.

Saturday, November 19, 2011

Friday Night Sew-In, November Edition

I'm very, very tired tonight. I worked all day, ran over to the annual quilt show on my lunch hour, picked up a couple prescriptions from the pharmacy after work, headed to Kohl's for a few things, and followed that by a stop at Michael's for a few more things. I then capped off my errands by picking up chicken wings and fries for dinner and hurrying home to participate in the Friday Night Sew-In--for what was left of the evening.

Having lost three days of potential productivity this week due to stomach flu meant having to compress five days worth of errands and chores into two days.

During the sew-in, I made a bit more progress on quilting my Christmas quilt. I started by finishing the swirly quilting in the center. Once done with that, I cleared the decks and flipped the quilt over to check for puckers and trim thread tails. That task completed, I decided it was time for a little treat, and I grabbed the camera while I was at it so I could better document my progress. Here are a few photos.


Yum! Hot chocolate with whipped cream! Stitch is pretending indifference.


Here you can see a bit of the quilting I've been doing. And if you look very closely, you might see the tip of a furry ear sticking up toward the back edge of the quilt.


Stitch yearned for a more active role in the Friday Night Sew-In.


Largely ignored, Stitch edged closer. "Can you see me now?"


It's really hard to quilt when you have a cat guiding your free motion quilting. At this point, I gave up, gave Stitch a good pet, and shut down for the night. Operating heavy mechanical machinery with sharp parts any later tonight probably isn't a very good idea anyway.

I have photos from the quilt show--I'll share those tomorrow night. Happy quilting!

Friday, November 18, 2011

It's Started

You know about the world ending on December 21, 2012, right? Well, I recently read that some people (world-ending expert types) think the REAL date is December 21, 2011. Yep, this year. I started to read about the reasoning behind the discrepancy, and I think there was something about Passover, yada, yada, yada . . . I don't know, because I got bored real quick. But it occured to me that it might be a good idea to put off Christmas until sometime in January. Because, really, I'd hate to spend so much of my final days shopping and preparing for a holiday that may never come.

Sadly, I haven't had much luck in persuading everyone else to hold off. Despite my best attempts, I find myself bombarded with everyone's holiday plans and parties. So I began. Let's just hope that come December 21st, I'm not sorry I did.


At my office, we're having a gift exchange, and the theme is something to do with "cute." I saw this snowman hat at Hobby Lobby and thought it might be the perfect gift for that occasion. I'll have to review the gift description again to make sure, but yep, this might be it. One down, fifty-three gifts to go.

When I got to work this morning, someone had ripped out a day from a Maxine flip calendar and taped it to my desk. Don't you love Maxine? It said, "Five words you'll never hear from me are 'I read your blog today.'" See? That's why I feel fairly safe telling YOU about a gift I got for someone in my office. Most of them think my blog is strictly about quilting and they'd rather poke a hot needle in their eye than read it.

My family has been given strict instructions to get our Christmas decorations down from the garage rafters by tomorrow night. This year I'd like to try to do some pre-decorating. What I have in mind is sorting out the decorations and getting my small trees, wreaths, and anything else along those lines decorated in the garage before bringing everything into the house right after Thanksgiving. I'm hoping this pre-decorating plan will help cut down on some of the time it takes to "really" decorate.

Tonight (Thursday), I hauled Hubby to Hobby Lobby and bought some things I'll need--mostly gift related things like containers and packaging. Tomorrow night I'd like to stop by a couple more stores to get more things--Michaels is one of the stops on my list.

And I'm starting to think about things like baking and candy making. In fact, I'm starting to feel like I need to get out a pen and some blank lined paper and start making lists. That's pretty hard core.

How about you? Have you started yet? Do you have any tips from years past that helped you save time and/or streamlined the preparations? I'd love to hear from you.

Thursday, November 17, 2011

Looks Like I'll Live

Thanks for the get well wishes. Around mid-afternoon today (Wednesday) I finally started to feel a lot better. One of the ways I knew I was feeling better was that I started getting kind of impatient to be doing SOMETHING besides sitting and laying around the house. It will be good to get out of the house and back to work tomorrow.

If it wasn't for the fact that I hadn't eaten anything that no one else shared, I would have suspected food poisoning, but I guess it was just a bug--I imagine I picked it up on our Saturday excursion to Apple Hill, since I was exposed to crowds of people and touched a lot of things that had no doubt been touched by others. The timing seems about right since I woke up early, early Monday morning with stomach cramps.

Mostly, I've done very little the last few days. I picked a Nora Roberts book from the bookshelf because I figured it would be decent light reading. I napped a lot too. The timing on the book worked out, because I finished it just about the time I started to feel better.

When I've felt up to doing anything, I've worked on quilting the Christmas quilt, but it's kind of slow going, even with the assistance of Stitch, my almost-constant companion.


While I've been sick, Stitch has napped with me, stretched out along my stomach (and legs) like a furry hot water bottle. Maybe he thought all that gurgling noise coming from my stomach was me purring.

I've done a small amount of applique on the crack rabbits quilt, adding wings to one of the chicks . . .


. . . and a crossing guard holding up a stop sign.


Now, it's time to get to bed and get a good night's sleep because tomorrow I plan to resume my normal life. Being sick sucks.


Come on, Stitch. Say goodnight.

Wednesday, November 16, 2011

Sick Day


Just a short post to say I've had a stomach bug the last couple of days, and about the only things on my mind at present aren't really appropriate for sharing. ARGH!

Tuesday, November 15, 2011

Garden Club Quilt, Parts 2 and 3

I thought I'd show you my progress on the Garden Club Quilt. You've seen bits and pieces of part 2 as I've demonstrated the applique methods I use--


And then on Sunday, I was having so much fun with the applique, I went on to make part 3:


Here's a photo of the two parts together on the design wall in roughly the same places they'll occupy when the quilt is finished:


If anyone was interested in purchasing a trolley, I found them at JoAnn's online--click HERE. Someone commented about burning themselves when using the trolley--that's not usually my problem. Generally, that happens when I'm doing anything else and I've forgotten I have a hot piece of metal sitting next to my right arm. Or I'm waving the iron around and not being careful. One of these days, I'll finally learn. I hope.

Now that I've finished the third part of this quilt, I'm ahead of schedule for the BOM, so I can set it aside and get my Christmas bed quilt quilted. And, of course, I still have my crack bunnies to finish. When it comes to quilting, there's just never enough time, is there?

Monday, November 14, 2011

More Applique

About a month ago, my friend Imelda agreed to show the rest of the ladies in our stitchery group the method of applique she likes to use, and I've been using her method ever since. I think it's a bit faster and eliminates a couple of the drawbacks to the method I explained a couple of days ago. Here's what she showed us.

First of all, this method requires a number of "tools," unlike the other method I demonstrated. And really the need for so much equipment is the only drawback I see with using this method. You'll need an Omnigrid thingy that has a cutting mat on one side and a pressing mat on the other--or something similar. I kind of like the Omnigrid product because I can put my pieces inside and take them with me, and I'll have a surface to work on wherever I may be. This comes in handy with our monthly stitchery get togethers.


You'll also need applique glue and a toothpick, an applique iron, spray starch and a small container with a lid, a thin paintbrush, and one of the metal trolley weapons tools you can see in the photo above. Make sure the applique glue you use is water soluble.

First you'll need to do all the preparation work I previously described for applique up to the point of basting the applique pieces with needle and thread. Before going further, check layout by placing all of the applique pieces where they'll eventually end up. This is a good time to check to make sure the colors and prints you're using work well together.


If everything looks right, turn on the applique iron and get out the starch and paintbrush. [Imelda sprays a small amount of starch into the lidded container and waits for the foam to subside.] Using the paintbrush, paint a bit of starch along the fabric close to the freezer paper. Too much liquid will soak into the paper and make it soft, so brush the starch on sparingly, and only work with a section an inch or two long at a time.


The metal trolley is worn on the middle finger of your non-dominant hand--for me, that's my left hand. The applique iron is held in the dominant hand. Which leaves no hands for holding the camera--so you'll just have to imagine I'm doing these steps using both hands working together.


Fold the starched fabric around to the back of the freezer paper and hold it in place with the metal trolley while setting the fold with the iron.


Repeat until all applique pieces are prepared. It will take a little while to get the hang of it, but mistakes are simple to iron back out and begin again.

Once the pieces are prepared, check again for placement of all of the pieces.


I prefer to attach and sew the applique pieces in layers. Clear all the pieces off the background that do not belong on the bottom layer--in this case, I'll begin with the two red pieces that form an "X".


First I peel away the freezer paper. Most of the time, the applique will hold its shape, but a little touch up with an iron helps if an edge isn't cooperating. Using a toothpick, run a thin line of applique glue along the outside of the applique piece but don't glue too close to the edge--glue would make it harder for a needle to go through the fabric.


The glue will dry quickly. You can then stitch the applique pieces to the background as I described in the prior applique post.

Repeat with additional applique layers until done.


The main benefit to using the glue rather than pins is that the thread, as you're sewing, won't get caught on a pin. I know of other appliquers who like to glue all the pieces before sewing, but when I tried doing that, I felt my results weren't quite as nice--you might want to experiment, though.


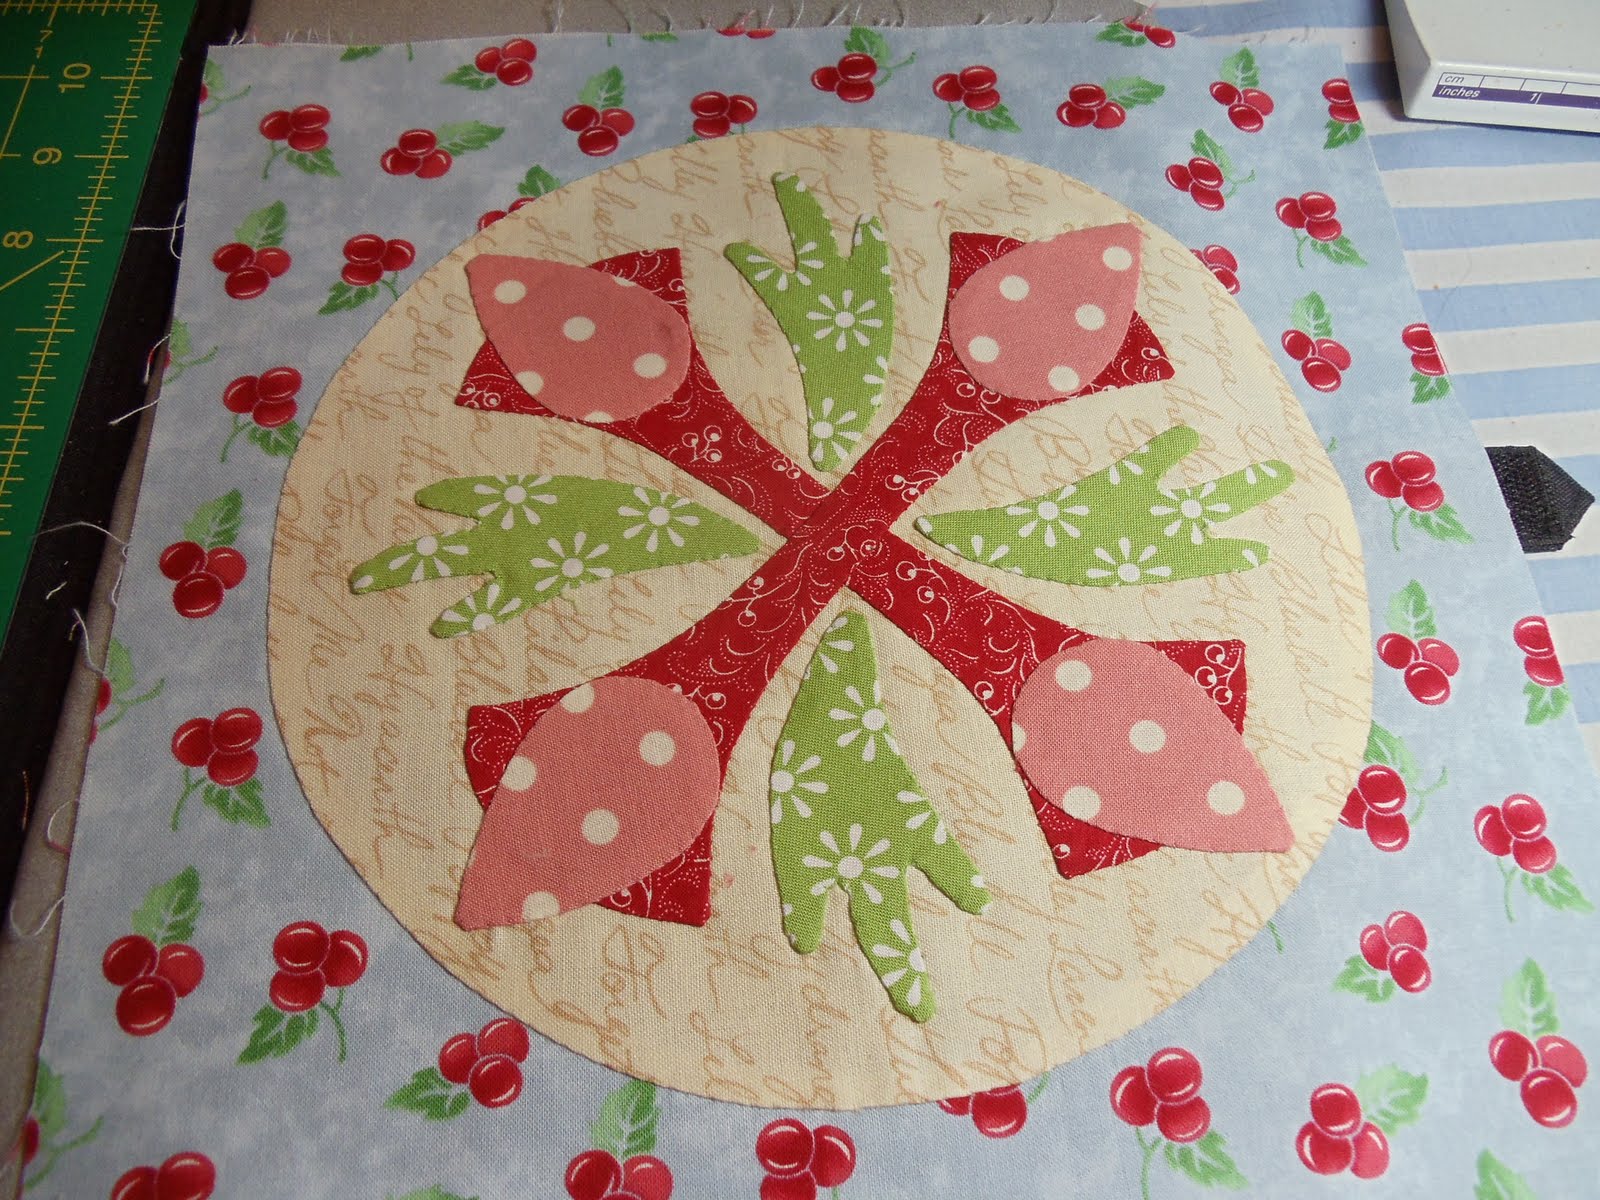
Here's what the back looks like. As you can see, the center of the circle is cut away where I used the method I described previously, but the rest, using this starch and glue method, are layered, and none of the under fabric is removed.

Using this method, once the quilt is completed and washed, the glue will wash out, but if you're planning to hand quilt an appliqued quilt, you may wish to use an applique method that doesn't employ glue as it would be harder to needle.

It will take me a bit longer to get as good at this method as my friend Imelda. I'm much more ham-handed and I seem to burn myself on the applique iron quite a lot. But I do think I like this method better--it has all the benefits of freezer paper applique while eliminating some of the problems, like getting thread tangled around pins. There are many other applique methods, and of course, needle turn is probably used more often by experienced appliquers than freezer paper, but I still like freezer paper best--you may find something different works best for you. The key, though, is in trying all the methods you can find and then deciding which you enjoy most. If you haven't tried applique before, give it a try. You might find you like it!