Continuing on with the applique tutorial . . . . Note that some of the photos are of Imelda demonstrating while I snap the pictures and some are of me demonstrating while the Wild Child does the honors.
Once the freezer paper templates have been traced and cut, you'll need to iron them onto the back of the fabric you want to use. In order to try to minimize frayed threads, I try to position the templates so the "valleys" (the inward points) and curves are on the bias of the fabric as much as possible because the bias edges fray less and stretch more.
In the above photo, Imelda is using her iron--this is one she uses for applique. In a minute, I'll show you the supplies you'll need, and you'll see my iron, which is a little different. Either style is fine.
For this first step, you can use a regular iron. On a regular cotton setting, iron the shiny side of the freezer paper template to the wrong side of the fabric--it magically sticks! Freezer paper templates can be used over and over several times.
Next, trim the fabric, leaving about a 1/8" to 1/4" seam allowance--this is the "extra" fabric that extends past the freezer paper template.
Now for the specialized supplies you'll need for starching and turning the fabric:
Most important, maybe, is a pressing surface. My friends and I like these little portable "book-style" combination pressing surface and cutting mats. Sure, you can use a regular ironing board, but these take up only a little space and can be used anywhere. And there's my iron--long and thin and different appearing than the one Imelda used in the photo above. And that pointy metal thing in the plastic container just under the iron? That's pretty important too! It's called a Trolley Needle, and you can see Imelda wearing one in the photo where she's demonstrating her iron. It's a handy tool that allows us to turn fabric and work with the iron without burning ourselves. Finally, you'll need starch--either spray starch or a liquid pressing starch, but not a concentrate--just the strength you'd spray on clothing. The starch is kept in a small, airtight container. I like to apply the starch with a paintbrush, but Imelda has this handy "pen" applicator--
It's called a fabric folding pen. Why? I'm not sure. And it's made for something else, but it will hold liquid starch and the tip applies it evenly.
Back to the applique. You'll want to clip into the "valleys" and inside curves. Some people like to clip the outside curves--the ones that will pleat or overlap a bit. I don't bother with that but it's a personal preference.
Here's Imelda trimming her pumpkin piece as I've described above.
Next she uses the starch pen to apply starch to the seam allowance close to the edge of the freezer paper template, but trying not to get the paper too wet, and working only a couple inches at a time. It's easiest to fold and press fabric that's damp from the starch, but if it dries, it will still work, or you can apply a little more starch.
Now, using the iron and the trolley, she manipulates the damp fabric over the edge of the freezer paper template and irons the seam allowance into place as she goes. Because the fabric is starched, it will stay in place.
(I told Imelda we'd have to do the photos over because her rather large diamond reflected the flash and whited out the shots. She believed me for a second.)
The first few times you try to fold over the fabric and iron at the same time, it will seem very awkward, especially wearing a long stiletto on your finger. But you'll "get" the technique fairly quickly. Another thing to watch for: Because the freezer paper gets damp too, sometimes it will fold with the fabric. If you find this has happened, just press the fabric back out, press the fold out of the paper, and begin folding and ironing again.
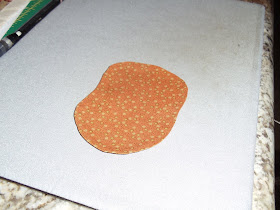
And here's Imelda's pumpkin! Want to see what happens next? Come back tomorrow!
Oh, and one final word of warning: When you're wearing a Trolley Needle, try not to forget you have it on and rub your eyes. NOT a good thing!


Thank you for doing this detailed tutorial, Kim. It is terrific.
ReplyDeleteI have never had success with this technique but maybe because I had never used (or heard of) a trolly needle. May have to search for one and give it a try! Thanks
ReplyDeleteYou and Imelda have taught me so much. Your tutorial is excellent! Great photos, details, hands and BLING! Hugs
ReplyDeleteThanks so much for this tutorial. I've been recently really admiring applique quilts, and have only done the raw edge applique technique, sewing with the machine. I've wanted to learn this more professional looking technique for a while, and your instructions are very clear.
ReplyDeleteCan you tell us how to handle folding under the points, inside and outside ones, too?
Thanks so much!
Great tutorial. I have never heard of a folding pen and since I do applique like you do I must go get one. Looks like it will work great for applique. Thanks.
ReplyDelete