A few people asked about the quilting I did on the witch quilt--the swirly "sky" background quilting. It's pretty simple to do--really! And I'll show you how.
Set your machine for free motion quilting--feed dogs down (or covered), stitch length "0," possibly adjusting your foot pressure depending on your machine, and changing your sewing foot to whatever you like to use for free motion quilting--I use an open toed circular foot on my Bernina and a closed circular foot on my Juki.
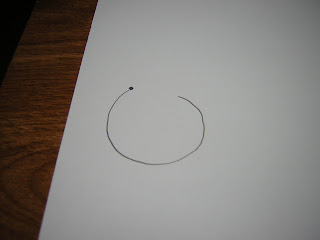
Start near the edge of the space you're going to fill in--see the dot on the paper below? That would be my starting point. My first loop identifies or marks the space I want to fill with the first "swirl."
I then continue sewing in a spiral to the center.
I loop around in the center and follow the path back out, sewing between the first stitch lines.
When I get to the outside of the swirl, I start the next "swirl" in the open space next to the first one.
At the center, I loop again and stitch my way back out. I then continue the curve to reach the next open area. I try to keep my swirls a uniform size, although some deviation just adds interest, I think.
Keep filling in, moving from one swirl to the next.
By this point, I have quite a few swirls and have filled in the space, or maybe I've boxed myself into a corner, so I'm ready to stop and move onto another area.
But before I do, I look at what I've done and check to see if there area any areas that may need a little more quilting to fill them in--I see a couple spaces, so I travel to them by quilting over my earlier stitches or, if they're too far, I just stop and restart.
If I end up with areas that are too small for a full swirl, I might continue the line from a neighboring swirl or--if it's right up against the border--I'll add some half loops.
I hope this helps! If anything's not clear, just ask and I'll be happy to explain further. And, if you haven't seen it yet, for more quilting "lessons," check out this blog--365 Days of Free Motion Quilting. Very cool stuff with video demonstrations and everything! Enjoy!


12 comments:
That is so helpful- thank you for explaining. At least if you quilt yourself into a corner its easier to extract oneself than painting oneself into a corner!!!
Thank you Kim, you did a wonderful job of explaining this technique.
Thanks, Kim! That looks like something I might want to try on my Tin Lizzie.
Might be simple for you but not me. This is where a stitch control would help.
Thanks Kim! I'm trying to get out of the ditch and want to get decent results with FMQ. I love the spiral pattern. I did not know about the stitch length to zero. I will have to try that. Does that make things easier? Since I am inconsistent I think I might run into more trouble? Hmmm I think a class is in order :-)
Thanks for posting the tutorial, that really breaks that quilting design down and shows how to do that... it really looked great on your quilt.
Thank you so much for the tutorial, can't wait to try it out!
Your tutorial almost makes me want to drag out my quilt tops that are waiting to be quilted. Almost.
However, you have actually peeked my interest in trying once again to attempt to get it together enough to contemplate the suggestion of the possibility of retaining your swirly tutorial for the perhaps not to distant time in space to muster up the energy to throw a rolled quilt over my shoulder and stuff it under the presser foot on my old Viking.
Tootles- I hear an embroidery project calling my name.
Thanks for the tutorial Kim... you make it seem so "straight forward" and doable!
How neat! Wish I could machine quilt well, I am longing for a long arm!!
Thank you, I've been trying to master this pattern. I think I've been starting out by making my swirl to small and then I run out of room. I usually end up just meandering around my first tight swirls.
Hmm, I must be hungry. All these swirls are making me think of cinnamon rolls!
Seriously, thanks for the tutorial, I am starting to feel brave enough to try it!
Post a Comment